TELEFON: 021/820-555, 062/111-0-999, MAIL: info@pansport.eu

PRIRODNI DODACI ISHRANI ZA SPORTISTE I REKREATIVCE I SPORTSKA OPREMA

Statistike foruma
Statistike foruma 394579 Teme od strane 25004 Članovi Poslednji član: Sandra1986

User Info
Dobrodošli, Gost. Molim vas prijavite se ili se registrujte. Da niste izgubili svoj aktivacioni mejl?
Mart 28, 2024, 07:37:15 posle podne
Napredna pretraga
Vesti
DOBRODOŠLI na PANSPORT FORUM!

WWW.PANSPORT.EU
Pomoć Pretraga Prijavljivanje Registracija PRODAVNICA
*
 |   |   |   |   | 
« prethodna tema sledeća tema »
Stranice: 1 2 [3] 4 5 ... 8 Idi dole Pošalji ovu temu Štampaj
Autor Tema: brzina ?  (Pročitano 52729 puta)
Peraa84
Gost
« Odgovor #88 poslato: April 18, 2008, 11:37:19 posle podne »

pa onaj ko me je stalo da se ubrza procitace :D
Sačuvana
Lokk1
Gost
« Odgovor #87 poslato: April 18, 2008, 12:19:48 posle podne »

nice .. samo ne znam ko ce ovo sve prochitati :D :D

btw .. plio zabada .. znachi efekti su stvarno wooow ..
Sačuvana
Peraa84
Gost
« Odgovor #86 poslato: April 18, 2008, 01:27:15 pre podne »

How to Determine Your Level of Soccer Fitness

What does a high level of soccer fitness really involve?

What better way to find out than looking at the physical attributes of the game's top players?

In this article we'll look at some of the ways you can test your own level of soccer fitness...

Testing or setting a bench mark before you begin a training program is an important step to success.

You can test yourself before the start of pre-season, again at the the start of the in-season and midway through the in-season.

There is nothing more encouraging than seeing objectively how much your fitness levels have come on.

Endurance in Soccer

Several studies into the physiological demands of soccer have shown that outfield players can travel up to 13 km or 8 miles during a 90-minute game (see the chart below).


A soccer fitness program should be built around developing a good aerobic base.

Just as we gauge maximal strength with a one repetition maximum lift, there is also a measure for maximal aerobic power - or aerobic endurance...

It's called VO2max and is simply the most amount of oxygen you can consume per minute relative to your bodyweight.

Elite endurance athletes like cross-country skiers and Tour de France competitors have VO2max values as high as 85mL.kg.min. To give you a frame of reference, VO2max is about 40mL.kg.min in males and 30mL.kg.min in females for the average population.

How do soccer players fair? Have a look at the table below..


Compared to the average population then, soccer players unsurprisingly have excellent endurance capacity.

You can estimate your own VO2max with a simple soccer fitness test like a 12-minute run.


Strength in Soccer

Strength forms the basis for power and speed. Soccer players also need strength to hold off challenges from opponents.

Professional soccer players don't tend to have the same absolute strength as American football players or rugby players for example. Too much bulk would hinder their agility and speed off the mark. Aerobic and strength endurance play a more substantial role in soccer than they do in American football.

The most common method for measuring absolute strength is to determine one repetition maximum. Usually the bench press is used for the upper body and leg press for the lower body.

Perhaps more important in soccer than absolute strength is relative strength...

Relative strength is simply your absolute or maximum strength adjusted according to your body weight. So a 140lb player who can leg press 280lbs is said to have greater relative strength than a player who can also press 280lbs but who weighs say, 165lbs.

If you can bench press your own body weight and leg press twice your body weight you have excellent relative strength.

Of course, this is a rough measure because 100lbs on one weights machine is often more difficult to lift than 100lbs on another machine.

Soccer players tend to have very well-developed quadriceps. The quads should be approximately twice the strength of the opposing hamstring muscle group, but in some players this difference can increase.

It's a good idea to spend time strengthening the hamstrings in relation to the quads if this is the case.

Speed & Agility in Soccer

Another significant component of a soccer fitness program is speed and agility training. The speed of play in today's game is said to be quicker than ever. While elite soccer players are by no means Olympic sprinters, all other things being equal, faster players have a marked competitive edge.

A very simple speed test is a sprint over 30 yards from a standing start. You can do this easily if you have someone time you. Take the average time over 3-4 sprints (with plenty of rest between attempts).

Anytime under 5.0 seconds is good. Professional players average 4.0 seconds.

Perhaps more important than all-out speed is speed endurance...


Flexibility in Soccer

Last and certainly not least is flexibility.

In most cases increasing your range of motion can be very beneficial - not only in the prevention if injury but to increase your speed, agility and power too.

Flexibility sessions should feature heavily in your soccer fitness regime.

Measuring flexibility is a simple procedure.

A test like the modified sit and reach, groin flexibility test or truck rotation test are all specific to soccer. You can also buy a large protractor called a goniometer to quickly measure the range of movement about a joint.

Off-season, pre-season and in-season program design


Off Season Soccer Training

Off season soccer training has two important objectives...

1. Physical recuperation and mental respite from a strenuous season

2. Minimize any losses in strength and conditioning built up over the year.

In fact one of the World's leading strength experts Tudor Bompa, suggests that "off season" is an inappropriate name. Instead he calls it the "transition phase" between two 12month programs.

The worst thing you can do during this time is nothing - especially if you have worked hard to build up your strength and fitness levels over the season. Remember, maintaining 50-60% of your peak fitness level takes less effort than starting from scratch.

And if you do nothing for just 5-6 weeks you will be starting from scratch.

Just as detrimental as doing nothing is maintaining your routine through the closed season. You MUST give your body (and mind) a rest. Even if you feel fresh enough to continue through the off season months, do so and mid way into the following season you could feel completely burnt out.

An off season soccer training program should also focus on rebalancing the body...

Chances are you have a predominant kicking foot. You've placed some muscles, tendons and joints under the same stresses time and time again. Now it's time to focus on stabilizing neglected muscle groups.

The off season soccer training phase should last between 4 and 6 weeks. Less is not enough time for adequate rest. More and you begin to lose significant amounts of the soccer-specific fitness gained from the previous year.

The focus should be on light aerobic endurance exercise and, in some circumstances, some resistance training.

Aerobic Endurance Training
Try to avoid too much running - especially on tarmac. This is a good time to try your hand at different sports or activities. Swimming, tennis, cycling or equipment like rowing machines and cross trainers are all good choices.

Aim for 2-3 sessions of 20-40 minutes per week. If you can, monitor your heart rate and aim for 60-70% of your maximum (maximum heart rate is calculated by subtracting your age from 220).

Resistance Training
You can take rest from all forms of resistance training for 4 weeks or so if you wish. However, as maximum strength takes a while to develop it can be a good idea to perform some core stability and stabilizing work in the off season.

That way you can move straight into the maximal strength phase at the start of pre-season preparation.

Two sessions per week is ample. Three is a maximum. Keep them short too - half an hour is reasonable and certainly under 45 minutes. Focus on core stability exercises, hamstring/hip extensor exercises, lower back exercises and functional strength movements (i.e. using a fitness balls and stability boards if you have access to them).

Strength sessions during off season soccer training must also be lighter intensity. No lifting maximum loads or performing sets to fatigue or failure.

Sample Off Season Soccer Training Program


Before we wrap up, you should still maintain your flexibility during the off season soccer training phase. Perform 10 minutes of stretching after your workout days (3 days a week).

Conditioning For Every Phase of The Soccer Season

The off season is just one phase in the annual soccer training plan. It paves the way for an effective pre-season, which in turn sets the standard ofr the entire competitive season...

Total Soccr Fitness - a complete guide to soccer conditioning developed by Sport Fitness Advisor - covers every phase of a soccer training program in detail (not just off season soccer training).

It outlines a step-by-step plan for developing soccer specific strength, power, speed and endurance. Along with precise sets, reps and exercise diagrams, it has become an invaluable tool for coaches and players at all levels...

THE END :D
« Poslednja izmena: April 18, 2008, 01:29:16 pre podne od strane Peraa84 » Sačuvana
Peraa84
Gost
« Odgovor #85 poslato: April 18, 2008, 01:13:03 pre podne »

pa kaze:

4.Static Stretching

Static passive stretching (more commonly referred to as just static stretching) has been used by coaches and athletes for years without question.

You may be aware of the current debate that started some years ago now, questioning whether static stretching prior to exercise really deserved the credence it has...

Static Stretches Before Performance

Once a staple part of the warm up, many strength and conditioning coaches are now suggesting that static stretches should be avoided just prior to competition. Their advice is based on a number of studies that have linked detrimental performance in power, maximal voluntary contraction, balance and reaction time tests with a static stretching routine shortly before (1,2,3,4).

However, before disregarding static stretching entirely (as a component of the warm up), it's important to take a closer look at the research. By no means have all studies found static stretches to have a negative effect on power performance (8,9,10,11). And in many studies that have found a negative association, the effects are often minimal (12,13).

Remember that this debate relates to an acute bout of static stretching prior to exercise. It is still considered important and benefical to athletes away from competition to to bring about a long-term increase in range of motion...

Long-Term Static Stretching Programs

While dynamic stretches may be more suitable as part of a warm up, static stretching is more effective at increasing range of motion.

Static stretching is slow and constant and held at an end position for up to 30 seconds (5,6). Static passive stretching uses an external force to hold the stretch in position. No muscle groups are statically contracted to hold the limb in position - as they are with static active stretching.

An example is holding one leg outstretched with the heel on the floor to stretch the hamstrings. Both floor and bodyweight act as the external forces to bring about the stretch in this muscle group. Lying supine (i.e. flat on the back face up) with one leg held extended at right angles to the body (hamstring stretch) is a static active stretch. If a partner holds the leg in that position it becomes a static passive stretch.

A static stretching program effectively increases range of motion over time (7). This chronic adaptation may reduce the risk of injury as it increase the safe range through which a joint can be taken without injury occurring to surrounding muscles and ligaments.

Perhaps most importantly, from the athlete's persepctive, regular stretching improves force production, speed and jumping ability (13).

static streaching exercise

This compilation of flexibility exercises targets all the major muscle groups.

Stretching should form a fundamental part of any exercise program and not just as part of the warm up...

In fact recent research suggests that static stretching may not be beneficial before training or athletic performance. Dynamic stretching seems to be more appropriate as part of the warm up.

If you're not sure what the difference is between various types of stretching see the main flexibility training section for more details.

The flexibility exercises on this page are classed as static stretches. When is static stretching best performed? Ideally, after an exercise session when the body is fully warm. Many athletes perform a series of flexibility exercises like those below at the end of a training session or even after competition.

While you don't have to be an athlete to benefit from stretching, you should be thoroughly warmed up before you begin to stretch.

Here are some general guidelines to bear in mind when following a flexibility program...

    *
      You should be thoroughly warmed up before performing these exercises
    *
      Stretch to just before the point of discomfort
    *
      The feeling of tightness should diminish as you hold the stretch
    *
      Breath out into the stretch. Avoid breath holding
    *
      Hold each stretch for 10-30 seconds
    *
      If tightness intensifies or you feel pain stop the stretch
    *
      Shake out limbs between stretches
    *
      Complete 2-3 stretches before moving onto the next exercise


Upper Body Flexibility Exercises

Stretch #1 – Shoulder & Chest
This can be performed kneeling or standing. Clasp hands behind back and straighten arms. Raise hands as high as possible and bend forward from the waist and hold.


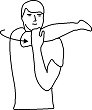
Stretch #2 – Arm Across Chest
Place one arm straight across chest. place hand on elbow and pull arm towards chest and hold. Repeat with other arm


Stretch #3 – Triceps Stretch
Place one hand behind back with elbow in air. Place other hand on elbow and gently pull towards head. Hold and repeat with other arm.


Lower Body Flexibility Exercises

Stretch #4 – Glute Stretch
Sitting on floor with right leg bent, place right foot over left leg. Place left arm over right leg so elbow can be used to push right knee. Hold and repeat for other side.


Stretch #5 – Adductor Stretch
Stand with feet as wide apart as is comfortable. Shift weight to one side as knee bends. Reach towards extended foot and hold. Repeat for other side.


Stretch #6 – Single Leg Hamstring
Place leg out straight and bend the other so your foot is flat into your thigh. Bend forward from the waist keeping your back flat. Hold and repeat with the other leg.


Stretch #7 – Standing Quadriceps
Standing on one leg grab the bottom of one leg (just above ankle). Pull heel into buttocks and push the hips out. Your thigh should be perpendicular to the ground. Hold and repeat with the other leg.


Stretch #8 – Standing Calf
Place feet in front of each other about 18 inches apart. Keep back leg straight and heel on the floor. Push against a wall to increase the stretch. Hold and repeat with other leg.


5.Isometric Stretching

One of most effective methods for improving static passive flexibility is through the use of isometric stretching.

An advanced form of flexibility training that must be prescribed with caution, it is useful for developing extreme range of motion associated with martial arts for example.

Placing an outstretched leg on a chair and using your bodyweight to bring about a stretch is an example of static passive stretching. If, during the stretch, the hamstrings are contracted (i.e. trying to bend knee by pressing the heel into the chair) the activity becomes an isometric stretch.

An isometric, or static contraction occurs when tension is created in the muscle group without a change in its length. A chair, wall, the floor or a partner can act as the resistance to bring about a static contraction and isometric stretch.

Aside from increasing range of motion, a second purpose of isometric stretching is to develop strength in stretched positions.

If someone with weak hip adductors attempts to see how far they can do a side split, there will come a point where their legs start to slide further and further apart. They simply don't posses the strength to hold themselves in position.

How Isometric Stretching Works

When a muscle is stretched, some muscle fibres are elongated while others will remain at rest. This is similar to the "all or none" principle of muscle contraction. The greater the stretch, the more individual fibres are stretched fully (rather than all fibres being stretched to a greater extent).

When a muscle, that is already in a stretched position, is subjected to an isometric contraction, additional fibres are stretched that would have otherwise remained at rest. Those resting fibres are pulled on from both ends by the muscle groups that are contracting. Fibres already in a stretched position (before the onset of the isometric contraction) are prevented from contracting by the inverse myotatic reflex and stretch to greater extent.

Isometric Stretching Guidelines

Here are the general guidelines that must be followed if isometric stretching is to be beneficial...

      1. Leave 48 hours between isometric stretching routines.

      2. Perform only one exercise per muscle group in a session.

      3. For each muscle group complete 2-5 sets of the chosen exercise.

      4. Each set should consist of one stretch held for 10-15 seconds.

      5. Isometric stretching is not recommended for anyone under the age of 18.

      6. If isometric stretching is to be performed as a separate exercise session, a thorough warm up consisting of 5-10 minutes of light aerobic exercise and some dynamic stretches must precede it.

      7. Do not perform isometric stretching as part of a warm up or on the morning of competition. It is too intense and may adversely affect power performance. Stick to dynamic stretches.


6. PNF stretching

PNF stretching (or proprioceptive muscular facilitation) is one of the most effective forms of flexibility training for increasing range of motion (1,2).

PNF techniques can be both passive (no associated muscular contraction) or active (voluntary muscle contraction). While there are several variations of PNF stretching, they all have one thing in common - they facilitate muscular inhibition. It is believed that this is why PNF is superior to other forms of flexibility training (1,2,3,4).

Both isometric and concentric muscle actions completed immediately before the passive stretch help to achieve autogenic inhibition - a reflex relaxation that occurs in the same muscle where the golgi tendon organ is stimulated. Often the isometric contraction is referred to as 'hold' and the concentric muscle contraction is referred to as 'contract'.

A similar technique involves concentrically contracting the opposing muscle group to that being stretched in order to achieve reciprocal inhibition - a reflex muscular relaxation that occurs in the muscle that is opposite the muscle where the golgi tendon organ is stimulated.

Using these techniques of 'contracting', 'holding' and passive stretching (often referred to as 'relax') results in three PNF stretching techniques. Each technique, although slightly different, involves starting with a passive stretch held for about 10 seconds.

For clarity and to compare each technique, think of a hamstring stretch in the supine (on back, face up) position for each example. The athlete places one leg extended, flat on the floor and the other extended in the air as close to right angles to the body as possible.

Hold-Relax


A partner moves the athlete,s extended leg to a point of mild discomfort. This passive stretch is held for 10 seconds.


On instruction, the athlete isometrically contracts the hamstrings by pushing their extended leg against their partner's hand. The partner should apply just enough force so that the leg remains static. This is the 'hold' phase and lasts for 6 seconds.


The athlete is then instructed to 'relax' and the partner completes a second passive stretch held for 30 seconds. The athlete's extended leg should move further than before (greater hip flexion) due to autogenic inhibition activated in the hamstrings.

Contract-Relax


A partner moves the athlete's extended leg to a point of mild discomfort. This passive stretch is held for 10 seconds.


On instruction, the athlete concentrically contracts the hamstrings by pushing their extended leg against their partner's hand. The partner should apply enough force so that there is resistance while allowing the athlete to push their leg to the floor (i.e. through the full range of motion). This is the 'contract' phase.


The athlete is then instructed to 'relax' and the partner completes a second passive stretch held for 30 seconds. The athlete's extended leg should move further than before (greater hip flexion) due to autogenic inhibition activated in the hamstrings.

Hold-Relax with Opposing Muscle Contraction


A partner moves the athlete's extended leg to a point of mild discomfort. This passive stretch is held for 10 seconds.


On instruction, the athlete isometrically contracts the hamstrings by pushing their extended leg against their partner's hand. The partner should apply just enough force so that the leg remains static. This is the 'hold' phase and lasts for 6 seconds. This initiates autogenic inhibition.

The partner completes a second passive stretch held for 30 seconds, however the athlete is instructed to flex the hip (i.e. pull the leg in the same direction as it is being pushed). This initiates reciprocal inhibition allowing the final stretch to be greater.

Here are some other general guidelines when completing PNF stretching:

      1. Leave 48 hours between PNF stretching routines.

      2. Perform only one exercise per muscle group in a session.

      3. For each muscle group complete 2-5 sets of the chosen exercise.

      4. Each set should consist of one stretch held for up to 30 seconds after the contracting phase.

      5. PNF stretching is not recommended for anyone under the age of 18.

      6. If PNF stretching is to be performed as a separate exercise session, a thorough warm up consisting of 5-10 minutes of light aerobic exercise and some dynamic stretches must precede it.

      7. Avoid PNF immediately before, or on the morning of competition.

Which type of flexibility training is best?

It depends on the sport and the athlete's outcomes - something which will be examined more closely in the articles below. As a general rule, dynamic stretches are used as part of a warm up and static stretches or PNF flexibility training is used for increasing range of motion.


Testing soccer-specific fitness

Fitness tests allow athletes and coaches to identify physical strengths and weaknesses. They act as a benchmark upon which a suitable training program can be developed.

In fact without an initial assessment any subsequent training may only address already strong areas while neglecting the athlete's weak points.

There are several reasons why fitness tests should form an integral part of the overall conditioning plan:

Benchmarking
A series of suitably selected tests builds a physical profile of the athlete. A benchmark can be set for each component of fitness. By comparing where the athlete is now to norms and standards, any major areas of weakness can be identified.

Most athletes have neither the time nor resources to spend hours training everyday. For them it's crucial that their training focuses on the 20% that will make 80% of the difference. This is a far more efficient approach than determining all the demands within the sport and dividing training time equally amongst each.

Goal Setting

Setting specific and measurable goals is a fundamental part of the modern-day athlete's approach to sport. It's not enough to say "I want to be fitter". It's not even enough to say "I want to be faster over 40 yards". A more appropriate target would be to "reduce my 40yard sprint time by 0.5 seconds by the end of the pre-season". Of course you can only set realistic and attainable goals like these if you know where you are starting from.

Feedback
Athletes at any level, who are serious enough to spend time training, want to spend that time as efficiently as possible. The only way to determine whether a training technique or program is achieving the desired results is to test regularly. Anything else is tantamount to 'shooting in the dark'.

Motivation
Taking objective measurements before and after a period of training can shown an athlete how far they have progressed. It's one thing to feel fitter or faster or stronger, but seeing definite results in black and white is usually more inspiring.

Whatever level you perform to, do not overlook the importance and necessity of fitness testing. If you take the time to plan your training then take one afternoon (or morning) to complete a battery of fitness tests.

Sačuvana
Peraa84
Gost
« Odgovor #84 poslato: April 18, 2008, 01:05:40 pre podne »

nastavak:

The Physiology of Flexibility

A number of anatomical and physiological factors influence an athlete's flexibility...

While some we are stuck with (such as age, gender, and joint structure), others are under our control. These include activity level, muscle bulk and stretching exercises.

1. Joint Structure
There are several different types of joint in the human body. Some intrinsically have a greater range of motion (ROM) than others. The ball and socket joint of the shoulder for example, has the greatest range of motion of all the joints and can move in each of the anatomical planes (1).

Compare the shoulder joint to the ellipsoidal joint of the wrist. It moves primarily in the sagittal and frontal planes. The hinge joint of the ankle is similar while the modified hinge joint of the knee allows on ROM in the sagittal plane.

2. Age & Gender
ROM and flexibility decreases with age. This is due, in part to the fibrous connective tissue that takes the place of muscle fibres through a process called fibrosis (1). Females tend to be more flexible than males. Older individuals should take encouragement that, just as with strength and endurance, flexibility can be increased at any age with training (2,3,4)

3. Connective Tissue
Deep connective tissue such as fascia and tendons can limit ROM. In particular, two characteristics of connective tissue, elasticity and plasticity are related to ROM. Elasticity is defined as the ability to return to the original resting length after a passive stretch (5). Plasticity can be defined as the tendency to assume a new and greater length after a passive stretch (5).

Ligaments do not seem to display any elastic properties. However, with exposure to stretching they may extend to a new length (9). The strength and conditioning coach must remember that increased mobility in the ligaments reduces the stability of the joint - often an unfavorable adaptation, particularly in contact sports.

4. Muscle Bulk & Weight Training
Hypertrophy of skeletal muscle can adversely affect ROM. It may be difficult for very bulky athletes to complete certain stretches such as an overhead triceps stretch. However, in these athletes, significant muscles mass is usually move favorable to their sport than extreme ROM.

Resistance training can increase flexibility (6) although when heavy loads are used within a limited ROM, weight training can reduce flexibility (7).

5. Proprioceptors
The capacity of the neuromuscular system to inhibit the antagonists (those muscles being stretched) influences flexibility (9).

There are two important proprioceptors involved in the mechanics of stretching and flexibility. The first is the muscle spindles. Located within the muscle fibres they monitor changes in muscle length. The stretch reflex is the body’s involuntary response to an external stimulus that stretches the muscle (5) and causes a reflexive increase in muscular activity. It is the muscle spindles that activate this response.

When stretching, it is best to avoid this activating the muscle spindles and the stretch-reflex response, as it will limit motion.

Static stretching does not elicit the muscle spindles, allowing muscles to relax and achieve a greater stretch.

The other important proprioceptors are the golgi tendon organs (GTO). These are located near to the musculotendinous junctions and are sensitive to increase in muscle tension. When the GTO is stimulated it causes a reflexive relaxation in the muscle. When this relaxation occurs in the same muscle that is being stretched, it is referred to as autogenic inhibition and can facilitate the stretch (8).

Autogenic inhibition can be induced by contracting a muscle immediately before it is passively stretched – a technique used in PNF stretching.

Reciprocal inhibition occurs when the GTO is stimulated in the muscle opposite to that being stretched (i.e. so the opposing muscle relaxes) (8). This can be achieved by simultaneously contracting the opposing muscle group to the one being passively stretched.

6. Internal Environment
The athlete's internal environment affects ROM. For example, mobility is decreased immediately upon waking after a night's sleep (9). Ten minutes in a warm (40oC) bath increases body temperature and ROM (9).

7. Previous Injury
Injuries to muscles and connective tissue can lead to a thickening, or fibrosing on the affected area. Fibrous tissue is less elastic and can lead to limb shortening and reduced ROM. Fibrous nodules in connective tissue and muscle are often called trigger points. A technique called myofascial release may be able to alleviate pain and restriction casued by trigger points.

Flexibility

Flexibility training is perhaps the most undervalued component of conditioning. While recent and ongoing debate questions its role in injury prevention, athletes can still gain much from a stretching regime.

From a volleyball spike to a rugby drop kick, flexibility of the body’s muscles and joints play an integral part in many athletic movements.

In general terms, flexibility has been defined as the range of motion about a joint and its surrounding muscles during a passive movement (1,2). Passive in this context simple means no active muscle involvement is required to hold the stretch. Instead gravity or a partner provides the force for the stretch.

The Benefits of Flexibility Training

By increasing this joint range of motion, performance may be enhanced and the risk of injury reduced (3,4). The rationale for this is that a limb can move further before an injury occurs.

Tight neck muscles for example, may restrict how far you can turn your head. If, during a tackle, your head is forced beyond this range of movement it places strain on the neck muscles and tendons.

Ironically, static stretching just prior an event may actually be detrimental to performance and offer no protection from injury (5,6). The emphasis is on "may" however, as a closer examination of the scientific literature shows that effects are often minimal and by no means conclusive.

Muscle tightness, which has been associated with an increased risk of muscle tears (7,8), can be reduced before training or competing with dynamic stretching. For this reason many coaches now favor dynamic stretches over static stretches as part of the warm up.

Competitive sport can have quite an unbalancing effect on the body (9,10). Take racket sports for example. The same arm is used to hit thousands of shots over and over again. One side of the body is placed under different types and levels of stress compared to the other. The same is true for sports like soccer and Australian rules football where one kicking foot usually predominates. A flexibility training program can help to correct these disparities preventing chronic, over-use injury.

Of course, a more flexible athlete is a more mobile athlete. It allows enhanced movement around the court or field with greater ease and dexterity. Some other benefits may include an increase in body awareness and a promotion of relaxation in the muscle groups stretched - both of which may have positive implications for skill acquisition and performance.

Types of Flexibility and Stretching

1. Dynamic flexibility -- the ability to perform dynamic movements within the full range of motion in the joint. Common examples include twisting from side to side or kicking an imaginary ball. Dynamic flexibility is generally more sport-specific than other forms of mobility.

2. Static Active flexibility -- this refers to the ability to stretch an antagonist muscle using only the tension in the agonist muscle. An example is holding one leg out in front of you as high as possible. The hamstring (antagonist) is being stretched while the quadriceps and hip flexors (agonists) are holding the leg up.

3. Static Passive flexibility -- the ability to hold a stretch using body weight or some other external force. Using the example above, holding your leg out in font of you and resting it on a chair. The quadriceps are not required to hold the extended position.

A flexibility training program can be made up of different types of stretching:

1 Dynamic stretching

Dynamic stretching uses speed of movement, momentum and active muscular effort to bring about a stretch . Unlike static stretching the end position is not held. (1)

Dynamic stretching is similar to ballistic stretching except that it avoids bouncing motions and tends to incorporate more sport-specific movements.

Arms circles, exaggerating a kicking action and walking lunges (without weights) are examples of dynamic stretches. A walking lunge dynamically stretches the hip flexors by emphasizing hip extension and can reduce muscle tightness around the hip joint necessary for competition.

Dynamic stretching is useful before competition and has been shown to reduce muscle tightness (2). Muscle tightness is one factor associated with an increase occurrence of musculotendinous tears (2,3). More recent scientific studies seem to suggest that dynamic stretches before competition are preferably to static stretches (4,5,6). This may be particularly true for strength and power athletes.

Dynamic Stretches & Stretching Routine

Dynamic stretches are best incorporated into your warm up routine before training or a competition.

More recently, clinical studies have shown that traditional static stretching exercise may be detrimental to sports involving powerful movements. Dynamic stretches seem to be more effective at reducing muscle stiffness, which is thought to increase the likelihood of muscle tears. For this reason, many coaches now advocate static stretching away from competition to increase range of motion, and dynamic stretching prior to performing for injury prevention and preparation.

Some of the exercises below incorporate a stability ball. Stability balls are great for developing functional strength and core stability. They inexpensive and extremely versatile. You will find them at any store that sells exercise equipment.

Dynamic Stretches

Arm Swings

1. Stand tall and hold arms out to your side.
2. Slowly swing your arms back and forth across the front of your body.
3. Repeat this continuous motion for 30 seconds.

Side Bends
1. Stand with a shoulder width stance. Place a toning bar on your shoulders (optional). 2. Lean to one side keeping your torso straight. Do not bend forward or backwards. 3. Hold for a count of 2 and then repeat to the other side. 4. Complete 10 stretches each side.


Trunk Rotations
1. Stand with a shoulder width stance. Place hands on hips.
2. With knees slightly bent, turn from side to side keeping feet firmly on the floor.
4. Complete a total of 15-20 full swings.

Full Back Stretch

1. Lie on your back and bring both your knees to your chest with hands clasped under back of knees.
2. Roll forwards until your feet touch the floor and then immediately roll back until just before your head touches the floor.
3. Continue until you complete 10-15 full rolls.


Abdominal Stretch
1. Start by lying on your back on the stability ball holding a toning bar at your chest (the toning bar is optional). 2. Push back with your feet and simultaneously push the bar over and behind your head.
3. Your legs should be straight and your arms outstretched.
4. Return to the starting position and repeat for 10-15 reps.


Hamstring Stretch
1. Lie on your back and place a piece of exercise tubing (or rolled up towel) around the bottom of one of your feet. 2. Pull the tubing and raise your leg at the same time until a comfortable stretch is felt. Return to the starting position and repeat for 10-15 repetitions.
3. Repeat with other leg.


Groin Stretch
1. Start by placing your right knee on top of a stability ball and maintain your balance.
2. Slowly spread your leg out to the side until you feel a stretch on the inside of your thigh.
3. Return to the start and repeat for 10-12 repetitions before changing to the other leg.


Alternate Toe Touches
1. Start by standing with your feet spread as far apart as comfortably possible.
2. Lean forward toward one leg and try to reach your foot or until a comfortable stretch is felt in your low back and hamstrings.
3. Now try to touch the other foot with the opposite arm. This motion should be continuous alternately touching each foot (as close as possible) with the opposite hand.
Important: skip this stretch you are prone to low back pain or if it causes you any discomfort.

Leg Swings
1. Start by standing with your feet shoulder width apart.
2. Keeping your upper body perpendicular to the ground swing one leg forward and backward.
3. Do not swing your leg so hard that you cannot keep your upper body from moving.
4. Repeat for 10 full swings and repeat on other leg. 5. You can also swing your leg across your body stretching the abductors and adductors.


Use these dynamic stretches as part of your warm up. Start with 10-15 minutes of light aerobic exercise to make sure the body is thoroughly warm. While they are not as effective as static stretching for increasing flexibility they can help to prevent injury and do not negatively effect strength and power immediately afterwards. Static stretches can be performed after training or competition to increase flexibility.

2. Ballistic stretching

Ballistic stretching involves active muscular effort similar to dynamic stretching. However, ballistic stretching uses a bouncing or jerking movement to increase the stretch.

Ballistic stretching is effective at increasing range of motion but has been associated with injury, particularly where there has been previous injuries (1). Ballistic stretches often activates the muscle spindles and triggers the stretch-reflex.(2)

An example ballistic stretch is bent over toe touching with a bouncing movement. On each movement, the athlete attempts to touch the ground using gravity and bodyweight to assist in the stretch.


3.Static Active Stretching

Static stretching is simply the opposite of dynamic stretching. The muscle groups are stretched without moving the limb itself and the end position is held for up to 30 seconds (1,2)

Static active stretching requires the strength of the opposing muscle groups to hold the limb in position for the stretch. For example, standing on one leg and holding the opposite leg out directly in front of you is classed as a static active stretch. The quadriceps actively hold the stretched limb.

Static active stretching is an effective way to increase active flexibility. A martial artist raising her leg up to an opponent's head and holding it there, is a good demonstration of static active flexibility. Being able to simply kick to head height is an example of dynamic flexibility.

A static active stretch should be held for 10-30 seconds for 1-2 stretches per muscle group. As with other forms of stretching, static active stretching is not recommended before a sporting event. It may impair balance and reaction time (3) and reduce power output and without any of the benefits of injury prevention (4,5,6).

As part of a warm up routine, incorporate dynamic stretches, which can help reduce muscle tightness and reduce the risk of injury.

Sačuvana
Peraa84
Gost
« Odgovor #83 poslato: April 18, 2008, 12:29:54 pre podne »

nastavak

Strength and strength endurance training

Strength training is an essential element of fitness for virtually every sports man and woman. Long gone are the days when coaches believed resistance exercises only added unnecessary bulk to the athlete, hindering their ability to execute skill.

The benefits of strength training to athletic performance are enormous and many. Not only is it an integral conditioning component for power athletes such as football and rugby players, performance in the pure endurance events can be improved with a well-structured strength routine.

However, aside from perhaps bodybuilders, sport-specific resistance training requires a more refined approach than simply lifting heavy weights to complete exhaustion. A physiological analysis of any game or event will confirm that most athletes require explosive power, muscular endurance, maximal strength or some combination of all three in order to excel. Rarely is pure muscle bulk the primary concern and when it is, other elements of strength are equally as important.

Elements of a Strength Training Program

Hypertrophy
Synonymous with most people’s perception of strength training, hypertrophy refers to increased muscle bulk and size. This is only one aspect of a sport-specific strength training program and one that should be included for only a select group of athletes. Football and rugby players require significant bulk to withstand very aggressive body contact. For most athletes however, too much muscle bulk is a hindrance. And remember that a larger muscle is not necessarily a stronger muscle.

Maximal Strength
Maximal strength is the highest level of force an athlete can possibly generate. Its importance will vary between sports but this relates more to the length of the maximal strength training phase than whether it should be included or not (1). The greater an athlete’s maximal strength to begin with, the more of it can be converted into sport-specific strength endurance or explosive power.

Maximal strength training can improve exercise economy and endurance performance (2,3). Interestingly, it does not appear to lead to a significant increase in muscle hypertrophy (4).

Explosive Power
Rarely is an athlete required to produce a singular maximal effort in their sport. With the exception of powerlifting, most sports require movements that are much more rapid and demand a higher power output than is generated during maximal lifts (5,6). So while maximal strength training lays an important foundation increasing the potential for additional power development, if there is no conversion of this strength into sport-specific power, the program as a whole is much less effective.

An athlete can be exceptionally strong but lack substantial power due to an inability to contract muscle quickly. Power training is used to improve the rate of force production and a range of methods such as plyometrics can be employed to convert maximal strength into explosive power.

Strength Endurance
Explosive power is not always the predominant goal of the strength training program. For events such as distance running, cycling, swimming and rowing, strength endurance is a major limiting factor. Again, the greater amount of starting maximal strength, the more of it can be maintained for a prolonged period.

Strength endurance can be developed through circuit training or the use of low weights and high repetitions. However, many strength endurance programs are inadequate for endurance-based sports - a set of 15-20 repetitions for example does not condition the neuromuscular system in the same way as a long distance event.

Periodization
The concept of periodization is key to sport-specific strength training. Dividing the overall training plan into succinct phases or periods, each with a specific outcome, allows sport-specific strength to peak at the right times, whilst minimizing the risk of over-training.

It also allows more specific elements of strength to be built on a solid and more general fitness foundation. Athletes cannot progress week-in week-out indefinitely so periodization permits variations in intensity and volume to promote performance enhancements for as long as possible.

Speed and agility training

Speed Training Section

What is speed? It is the ability to reach a high velocity of movement in whatever mode of locomotion – running, cycling, skating swimming etc (1).

Very often, agility is more relevant to successful sports performance than all-out speed. Agility is the ability to explosively brake, change direction and accelerate again.

Another element of fitness closely related to speed training is speed endurance. Many athletes must maintain a high velocity for longer than 6 seconds or produce repeated sprints with minimal rest periods in between.

The combination of speed, agility and speed endurance an athlete requires is determined by his or her sport. But regardless of the event, there are several modes of training that are integral to developing a ‘fast’ athlete:

Strength & Power Training
Speed is chiefly determined by the capacity to apply a large amount of force in a short period of time. This is also known as power. Many athletic movements take place in 0.1 to 0.2 seconds but maximal force production takes 0.6 to 0.8 seconds. The athlete who can apply most force in the short period of available time is said to be the most powerful.

Strength training increases maximal force production. Assuming as a result, more force can be produced in the same period of time, strength training alone can increase power. However, it makes more sense to increase both maximal force production and the rate of force development. This can be achieved through power training. Both strength and power training are integral to improvement of speed.

Speed Training
Practising moving and accelerating faster helps to condition the neuromuscular system to improve the firing patterns of fast twitch muscle fibers. Two variations of basic speed training are assisted and resisted speed training. Assisted training (also called overspeed training helps to improve stride frequency (2,3,4). Resisted speed training helps to improve speed-strength and stride length (2,3,4).

Agility Training
Most team sports consist of very few movements that occur only in a straight line. Nor do those movements occur at a fixed pace or for a fixed length of time. Agility and quickness training improves an athlete’s ability to change direction, brake suddenly and perform sport-specific skills with speed and dexterity.

Compare speed training to strength training for a moment. A sport-specific strength training program will first aim to develop basic strength. This is on the premise that a solid base of strength offers greater physical potential to work with when converting it to sport-specific strength later on. Basic speed training along with power training maximises the athlete’s ability to move rapidly. Agility training helps an athlete to apply their speed to sport-specific scenarios.

Sample Soccer Speed Drills

Use these sample soccer speed drills to improve your speed off the mark, acceleration and agility...

Speed training should not be physically exhausting...

A slow jog or walk between each sprint or drill should be long enough for full recovery. Your focus must be on quality and form.

A typical speed training session could consist of 3-5 sets of 10 repetitions in total (a repetition being a sprint or drill).

As long as you allow enough recovery period in between sets and reps the soccer speed drills can performed the day before a game. They are a nice "loosener" and help to brush up your sharpness ready for the game at hand.

Alternative Starts

The basis of these soccer speed drills is a 10-20 yard sprint. You start focus on accelerating as quickly as possible by powering away with your arms and legs. If this is a team session, make it more interesting by have 2 or 3 players sprint against each other.Alternate the start to make it more soccer-specific. Here are some ideas...

    *

      Do 1-3 push ups, squat thrusts or burpees and sprint
    *

      Start by kneeling, lying face down, sitting on your hands (which you're not allowed to use to get up) and sprint
    *

      Do 5 keep ups or 5 ball touches and sprint
    *

      Have some one throw or pass your the ball for you to control and lay off and sprint
    *

      Run backwards for 4.5 meters and turn and sprint
    *

      Touch left hand down, touch right hand down, jump to head the ball and sprint

Speed Ladder

Speed ladders are simple pieces of equipment that allow athletes to develop fast feet and co-ordination. Drills include...

    *

      High-knee running with very short strides (short enough so both feet touch the ground in each section)
    *

      Side steps in and out of the side of the ladder
    *

      Bounding from one section to another

Stepping Strides

1. Place a series of markers on the ground about 1 yard apart for a total of 10 yards.
2. From a standing start run the length of the markers as fast as possible but making sure to take one stride (one ground contact) between each marker.
3. Move the markers closer together and repeat. Now move them further apart and repeat. Each time focus on taking only one stride between each marker.

Over Speed Training

Rather than working on power, these soccer speed drills develop leg speed movement and co-ordination. A simple drill to promote over speed is to run down hill. It should be a very slight hill, anything more and form is lost and the injuries are gained!

A small, grassy embankment is ideal. Again keep sprints to 10 yards. You buy something called a speed harness - rubber bungees that pull you along. But you really don't need for soccer.

Resistance Speed Training

This is the opposite to over-speed drills. Here the emphasis is on developing leg power over the first few yards. An incline (again grassy embankments are good) of about 30 degrees is ideal. You may need longer recovery between reps as these drills are more intense.

Resistance parachutes have the same effect but they are expensive and not practical for group training.

Some pro soccer teams train on sand dunes - uphill and down hill. This is ok for pre-season work and will build muscular endurance. But they are not suitable for speed sessions as you can imagine.


Six Soccer Agility Drills

se these sample soccer agility drills to improve your balance, body control, foot speed and co-ordination.

Like speed drills, agility drills should not be physically exhausting...

A slow jog or walk between each drill should allow complete recovery. The emphasis must be on quality and form.

Because these soccer agility drills are not physically demanding, you can perform them any time during the week and on any day. One quick tip however...

Many coaches like to get all the intense physical training out of the way before move on to (more enjoyable?) skill practise. The problem is skills need to be performed with near perfect form. Practise does NOT make perfect - it makes permanent. So rehearse getting it right!

With that in mind I would perform soccer agility drills and skill work after the warm up before moving into more enervating, fitness drills. A typical agility session could consist of 3-5 sets of 10 repetitions in total (a repetition being one drill).

1. Weave In - Weave Out
1. Place 4 markers out in a straight line approximately 3 yards apart.
2. In between each set of markers place another marker only 3 yards to the left. (see diagram right)
3. Sprint from one marker to the next bending down to touch each one with your hand.
4. The emphasis is on taking quick side steps, rather than turning to face the marker and sprinting forward - that takes more time (which don't have in a game).


2. Follow the Leader
1. Mark out a large area - 20 yards by 20 yards for example.
2. Pair up with a team mate and have them run randomly within the area.
3. Try to maintain 2 yards distance from them at all times. Your team mate should be changing direction and pace constantly.


3. Box Drill
1. Use 4 cones or markers to mark out a square approximately 5yards by 5yards.
2. Place a cone in the center of the square. This is your starting position.
3. Give each corner a number and remember it! Have a team mate (or your coach) call numbers at random.
4. Sprint to the corner shouted and return to the middle.


4. Mini Shuttle
1. Place 2 markers 20 yards apart. Place marker in the middle only 3 yards to the side.
2. Starting from the middle marker sprint to one end (10 yards), turn and immediately sprint to the other end (20 yards) and then back to the start (10 yards).
3. Turn on a different foot at each marker and try to touch the ground with your hand.


5. Super Shuttle
1. Set a series of cones out in a cross formation.
2. Run backwards to the center cone, side step to the right cone (or your left if you are performing the drill), side step back to the centre cone still facing the same way.
3. At the center cone turn and sprint forward to the end cone. Now run back to the center cone, side step to the left, side step back to the center, then turn and sprint back to the start.
4. Phew! Sounds complicated - it's not - the diagram explains it quicker than I can!


6. Slalom
1. Place 10 shuttles in a line 5 yards apart.
2. Weave in and out as fast as possible and walk back to the start.
3. This exercise is often performed much more slowly with a ball. The goal here is to develop speed of leg movement so no ball is used.

Use the soccer agility drills above as they are or adapt them to fit your individual or team's needs.

« Poslednja izmena: April 18, 2008, 12:34:42 pre podne od strane Peraa84 » Sačuvana
MANIAC
Redovan član
****
Van mreže Van mreže

Poruke: 614

NO SURRENDER

« Odgovor #82 poslato: April 18, 2008, 12:02:46 pre podne »

cista desetka za prikaz vezbi, svaka cast, planiram da krenem sa ovim vezbama u teretani cim mi se ligamneti u potpunosti oporave.
Sačuvana
''NE MORAS BITI NAJBOLJI, BUDI NAJBOLJI STO MOZES"
Peraa84
Gost
« Odgovor #81 poslato: April 17, 2008, 11:58:49 posle podne »

e pa jel mozes da mi odgovoris pogledaj moje pitanje pre ova dva posta :D

Plyometrics For Soccer

Using plyometrics for soccer is one the most effective ways to increase explosive speed and power.

Research has shown that a muscle stretched before contraction will contract more forcefully and rapidly. And that is basically what plyometric exercises do...

They stretch muscles rapidly and then immediately demand a powerful concentric contraction. Let's break that last sentence down with a practical example...

Imagine the jumping movement to win a header.

The very first phase of this movement has to be a downward thrust. Try it. Try jumping off the ground without first bending your knees.

As you "dip" down just before a standing jump you are stretching muscle groups like the quadriceps and hip extensors. These are the muscles that will contract very forcefully a split second later to produce the jump. Now here's the key...

The shorter or more rapid this downward movement or pre-stretching phase is, the more forcefully those muscle groups can contract. And hence... lift off!

The science behind why this occurs can get quite technical - we'll save that for another article. For now...

Can you see how general strength training like lifting heavy weights with a controlled rhythm does nothing to promote a quick pre-stretching phase?

As a side note, do NOT use weights, even light loads when performing plyometrics for soccer. Bodyweight provides ample resistance and as we'll see later, excellent form is crucial.

It's not just jumping that requires this "pre-stretching" type of movement. Any explosive movement - rapid changes in direction, sprinting (as each leg is planted on the ground) and of course, kicking, will all benefit from plyometrics for soccer.

Important Guidelines for Plyometric Training

Here are some very important guidelines to bear in mind before commencing plyometrics for soccer...

    *

      Warm up with 5-10 minutes of light aerobic activity followed by 5-10 minutes of stretching to all major muscle groups.
    *

      Perform plyometrics for soccer at the start of a training session before endurance training or lots of ball work. Muscles should be fresh.
    *

      Plyometric training will not leave you out of breath or even feeling tired. Athletes often feel the urge to do more. Don't. Stick to your program to avoid injury and severe muscle soreness 34 hours later!
    *

      Actions should be performed at high speed and with maximum intensity while maintaining high quality. For example, in jumping exercises, as your feet touch the ground you should explode upwards rapidly. Don't sink into a deep squat - minimize ground contact time.
    *

      Two minutes rest between sets is normal. Remember, the idea is not become fatigued. Keep good form.
    *

      Plyometrics for soccer should not contain more than 120 ground contacts for each muscle group in each session.
    *

      Two sessions per week with 24-48 hours rest between during the late pre-season are ample. One session a week is enough during the in-season.
    *

      It goes without saying - if any muscle feels sore during a session, end it immediately.

There is one more very important pre-condition before performing plyometrics for soccer...

You must develop a solid, well-balanced strength base before you begin. Fail to do that and they can do more harm than good. If you've read some of the other articles you'll know that plyometrics converts existing strength into power. The strength has to be there initially.

Some Sample Plyometric Exercises for Soccer

Here are some sample plyometrics for soccer exercises. A session might contain between 10 and 15 sets of 8 to repetitions in total. For example, you could choose 4 exercises and perform 3 sets of 8 reps for each exercise.

Jump Running
This is one of the easiest plyometric exercises. Simply run in 'slow motion' landing on alternate feet. Try to achieve as much height and distance with each stride as possible. For every right and left foot strike, count one repetition.

Bounding
1. Mark out a series of small cones or obstacles about 3 feet apart in a straight line. The number of obstacles depends on the number of repetitions you are performing.
2. Start behind the first obstacle in a semi squat position.
3. Jump as high and far as possible over each obstacle. It's a good idea to practise first to gauge how far apart you should set the markers. Again try to minimise ground contact time.
4. You can use anything to jump over, a training top or even just a line on a track.

Ricochets
1. Mark out a small box shape on the floor (about 2 feet square) with paint or chalk.
2. Keeping your feet together, start at one corner of the box and perform small jumps from corner to corner in a random manner.
3. For this exercise the emphasis should be on speed and rate of leg movement rather than height.
4. Each ground contact is 1 repetition.

Lateral Jumps
This is an advanced plyometric exercise. Build up to it over several weeks. Keep the total number of sets for advanced exercise down to 3-6.
1. Stand alongside a bench, box or cone approximately 30cm high.
2. Keeping your feet hip distance apart jump sideways as high over the obstacle as possible.
3. Immediately jump back to the start position minimising ground contact time. This counts as one repetition.
4. You can use anything to jump over, a training top or even just a line on a track. Just make sure you discipline yourself to jump as high as possible.

Depth Jumps
This is an advanced plyometric exercise. Build up to it over several weeks. Keep the total number of sets for advanced exercise down to 3-6.
1. Stand on a box, bench or sturdy chair approximately 30-40cm high.
2. Step off the bench (don't jump off) and as soon as you land explode vertically as high as you can.
3. Try to minimise ground contact time i.e. don't sink down into a deep squat before jumping up.

A Step-By-Step Guide to Using Plyometrics for soccer

Plyometrics really is one of the most effective ways to imporve speed and power - but you MUST get it right...

Plyometrics for soccer is covered in detail in "Total Soccer Fitness" - a complete soccer conditioning guide recently developed by Sport Fitness Advisor. It has already been used by coaches and players across the world to dramatically improve their (or their team's) perfromance...

Along with precise sets, reps, program design and fully illustrated exercises, it shows you precisely how to use plyometrics in a soccer conditioning plan. Of course it covers every element of fitness important in the game...
    *
      Strength and strength endurance training
    *
      Speed and agility training
    *
     Aerobic and anaerobic endurance training
    *
      Flexibility, warming up and cooling down
    *
      Testing soccer-specific fitness
    *
      Nutrition for soccer
    *
      Off-season, pre-season and in-season program design
Sačuvana
DHEA
Napredni član
******
Van mreže Van mreže

Poruke: 1303


"Менаџер физичких послова"

« Odgovor #80 poslato: April 17, 2008, 11:36:55 posle podne »

Hvala! Odličan prikaz pliometrijskih vežbi!

Samo da dodam da su ove vežbe dobre za naprednije rekreativce ili za ulazak u nešto ozbiljniji trening! Aktivni sportisti koriste slične vežbe sa varijacijama!
Sačuvana
Never underestimate your power to change and improve yourself.

Somethnig is better then nothing. More is defenitly better then something. So, stop talk and do more work!
Peraa84
Gost
« Odgovor #79 poslato: April 17, 2008, 09:58:45 posle podne »

Lower Body Plyometric Exercises

Lower Body Plyometric Exercises (Low Intensity)

Squat Jumps
1. Stand with feet shoulder-width apart, trunk flexed forward slightly with back straight in a neutral position.
2. Arms should be in the “ready" position with elbows flexed at approximately 90°.
3. Lower body where thighs are parallel to ground and immediately explode upwards vertically and drive arms up. Do not hold a squat position before jumping up – keep the time between dipping down and jumping up to a minimum.
4. Land on both feet. Rest for 1-2 seconds and repeat
Prior to takeoff extend the ankles to their maximum range (full plantar flexion) to ensure proper mechanics.


Jump to Box
1.Stand facing box with feet slightly wider than hip-width apart.
2.Lower body into a semi-squat position and immediately jump up onto box. Do not hold a squat position before jumping up – keep the time between dipping down and jumping up to a minimum.
3. Feet should land softly on box. Step back down (not jump back down) and repeat.


Lateral Jump to Box
1. Stand side on to box with feet slightly wider than hip-width apart.
2. Lower body into a semi-squat position and jump up onto box. Do not hold a squat position before jumping up – keep the time between dipping down and jumping up to a minimum.
3. Feet should land softly on box. Step back down (not jump back down) and repeat.


Lower Body Plyometric Exercises (Moderate Intensity)

Split Squat Jumps
1. Stand with feet hip width apart. Take left leg and step back approximately 2 feet standing on the ball of back foot.
2. Feet should be positioned at a staggered stance with head and back erect and straight in a neutral position.
3. Lower body by bending at right hip and knee until thigh is parallel to floor then immediately explode vertically.
4. Switch feet in the air so that the back foot lands forward and vice versa.
Prior to takeoff extend the ankles to their maximum range (full plantar flexion) ensure proper mechanics.


Tuck Jumps
1. Stand with feet shoulder-width apart, knees slightly bent, with arms at sides.
2. Jump up bringing knees up to chest.
3. Land on balls of feet and repeat immediately.
4. Remember to reduce ground contact time by landing soft on feet and springing into air.


Lateral Box Push Offs
1. Stand to side of box and place the left foot on top of box.
2. Push off the box using the left leg only and explode vertically as high as possible. Drive the arms forward and up for maximum height.
3. Land with right foot on the box and left foot on the ground to the other side of the box.
4. Repeat from this side.


Bounding
1. Jog into the start of the drill for forward momentum.
2. After a few feet, forcefully push off with the left foot and bring the leg forward. At same time drive your right arm forward.
3. Repeat with other leg and arm
4. This exercise is an exaggerated running motion focusing on foot push-off and air time.


Bounding with Rings
1. Jog into the start of the drill for forward momentum.
2. After a few feet, forcefully push off with the left foot and bring the right leg forward. At same time swing left arm forward and land into the first ring, which is 3-4 feet out and to the left, with the right foot.
3. Continue and repeat with other leg and arm into the second ring, which is now 3-4 feet up and to the right.
4. This exercise is an exaggerated running motion focusing on foot push-off and air time.


Box Drill with Rings
1. Stand with feet slightly wider than hip-width apart with your body facing the first ring.
2. Hop forward using both feet and land in first ring.
3. Now hop to the left and land in the ring to the side. Now jump backwards to land in ring behind you. Finish by jumping to your right to land in final ring.
4. Rest and repeat. Remember to keep ground contact time between bounds to a minimum.Hurdle Jumps


Lateral Hurdle Jumps
1. Stand beside object to be cleared.
2. Bring knees up and jump vertically but also laterally off ground and over the barrier.
3. Land on both feet and immediately jump the other direction over barrier.
4. Try not to pause between jumps or sink down into a squat position.


Lower Body Plyometric Exercises (High Intensity)

Zigzag Hops
1. Stand to the left of an agility ladder or similar object approximately 1-2 feet away.
2. Forcefully push off both feet and land the on the other side of the ladder.
3. Repeat and land feet back on the other side, continue repeating and so on down the ladder.4. Do not "double hop" upon each landing and keep ground contact time to a minimum.


Single Leg Lateral Hops
1. Start by standing on one leg with your hands on your waist or at your sides.
2. Proceed to hop to the side while maintaining your balance and hop back to the starting position.
3. You can place a rope on the ground or any object on the ground. The object can be small in size and height or large to increase difficulty.
4. Repeat continuously.


Depth Jumps
1. Stand on box with toes close to edge, feet shoulder width apart.
2. Step off (do not jump off) box and land on both feet. Immediately jump up as high as possible and reach up with both hands towards. The jump should be vertical with no horizontal movement.
4. Ground contact time should be short unlike in the diagram. Landing should be soft.Note: Start with a box height of 30cm (12in). Intensity can be increased by gradually increasing the box height to a maximum of 107cm (42in) but this is only for experienced athletes with a substantial strength training background.

Sačuvana
Peraa84
Gost
« Odgovor #78 poslato: April 17, 2008, 09:49:26 posle podne »

evo nasao sam neke vezbe :

Upper Body Plyometric Drills

Overhead Throws
1. Stand with one foot in front (staggered stance) with knees slightly bent.
2. Pull medicine ball back behind head and forcefully throw ball forward as far as possible into the wall.
3. Catch ball on the bounce from the wall and repeat according to prescribed repetitions. Keep the time between pulling the ball back and starting the throw (transition phase) to a minimum. Can also be completed with a partner instead of a wall.


Side Throws
1. Stand with feet hip-width apart; place left foot approximately one foot in front of right foot.
2. Hold medicine ball with both hands and arms only slightly bent.
3. Swing ball over to the right hip and forcefully underhand toss ball forward to a partner or wall. Keep the stomach drawn in to maximize proper usage of muscle.
4. Catch ball on the bounce from
your partner or wall and repeat.


Over Back Toss
1. Stand with feet slightly wider than hip-width apart. Have a partner or trainer stand approximately 10-15 yards behind you.
2. Grasp ball and lower body into a semi-squat position. Explode up extending the entire body and throwing medicine ball up and over the body.
3. The goal is to throw the ball behind you as far as you and generating most of the power in the legs.
4. Catch ball on the bounce from your partner and repeat according to prescribed repetitions.


Slams
1. Stand with feet parallel, shoulder-width apart and knees slightly bent.
2. Pull medicine ball back behind head and forcefully throw ball down on the ground as hard as possible.
3. Catch the ball on the bounce from the ground and repeat according to prescribed repetitions.


Explosive Start Throws
1. Stand with feet slightly wider than hip-width apart. Knees should be slightly bent.
2. Pick medicine ball up to chest level.
3. Quickly explode up and press the ball straight out as far and fast as you can.
4. As you press the ball forward explode with either leg so that you actually sprint forward a couple of steps.


Single Arm Overhead Throws
1. Stand with feet slightly wider than hip-width apart.
2. Grasp medicine and lower body into a semi-squat position. Explode up extending the entire body and throwing the medicine ball up into the air.
3. The aim is to throw the ball as high as you can and generating most of the power in the legs.
4. Catch ball on the bounce and repeat.


Squat Throws
1. Stand with feet slightly wider than hip-width apart. Knees should be slightly bent.
2. Hold medicine ball at chest level and squat down to a parallel position.
3. Quickly explode up and jump as high as you can. As you start your jump you should start to shoulder press the ball up and reach full extensions with the arms when you are at the peak of your jump. Push ball as high as possible into the air. Try to minimize the time spent in the squatted position. It should be a quick squat and jump.
4. Catch ball on the bounce and repeat according to prescribed repetitions.


Plyometric Push-Ups
1. Start by getting into a push-up position.
2. Lower yourself to the ground and then explosively push up so that your hands leave the ground.
3. Catch your fall with your hands and immediately lower yourself into a push-up again and repeat.

Sačuvana
Peraa84
Gost
« Odgovor #77 poslato: April 17, 2008, 08:56:02 posle podne »

a kako se postize eksplozivnost i brzina udarca  osim treniranja tehnike i ponavljanja udaraca!Hteo bih da poboljsam svoju brzinu udarca i  eksplozivnost posto planiram za nekih god dana da se takmicim!Visok sam 187-8 imam 87-8 kg
Sačuvana
Lokk1
Gost
« Odgovor #76 poslato: Decembar 28, 2007, 12:32:47 pre podne »

ne ne .. ono ... poredjash po kutiju na svaki metar pa skakucesh po njima il tako neshto ... kao 8 kutija teba .. i prepone isto ....
 i odakle mi stepenik na teretnu LOL :D


prepone radim otprilike, odnosno skocis koliko god mozes u vis, a za stepenik to trcim na indexu pa tamo imaju i fine tribine za to...

daaa ... index ...

a mladost = livada ... tako da ...
Sačuvana
quaresma
Fakultet za sport i turizam tims. assistant
Ultra napredni član
******
Van mreže Van mreže

Poruke: 2212


« Odgovor #75 poslato: Decembar 28, 2007, 12:09:53 pre podne »

ne ne .. ono ... poredjash po kutiju na svaki metar pa skakucesh po njima il tako neshto ... kao 8 kutija teba .. i prepone isto ....
 i odakle mi stepenik na teretnu LOL :D


prepone radim otprilike, odnosno skocis koliko god mozes u vis, a za stepenik to trcim na indexu pa tamo imaju i fine tribine za to...
Sačuvana
MSc Sport Scientist
Faculty of sport and tourism - Assistant
Center of Health, Exercise and Sport Science CHESS
http://chess.edu.rs/

sasa.semeredi@gmail.com   feel free to contact me

Practice will not make you perfect, perfect practice will make you perfect.
Lokk1
Gost
« Odgovor #74 poslato: Decembar 28, 2007, 12:01:05 pre podne »

ne ne .. ono ... poredjash po kutiju na svaki metar pa skakucesh po njima il tako neshto ... kao 8 kutija teba .. i prepone isto ....
 i odakle mi stepenik na teretnu LOL :D
Sačuvana
Stranice: 1 2 [3] 4 5 ... 8 Idi gore Pošalji ovu temu Štampaj 
« prethodna tema sledeća tema »
 

SMF 2.0.19 | SMF © 2017, Simple Machines | Supported by | | Buttons by Andrea
Stranica je napravljena za 0.165 sekundi sa 17 upita.